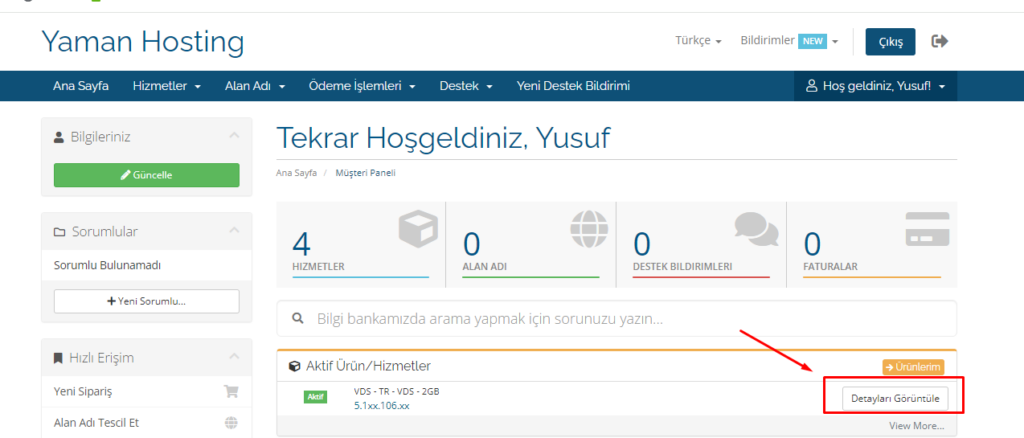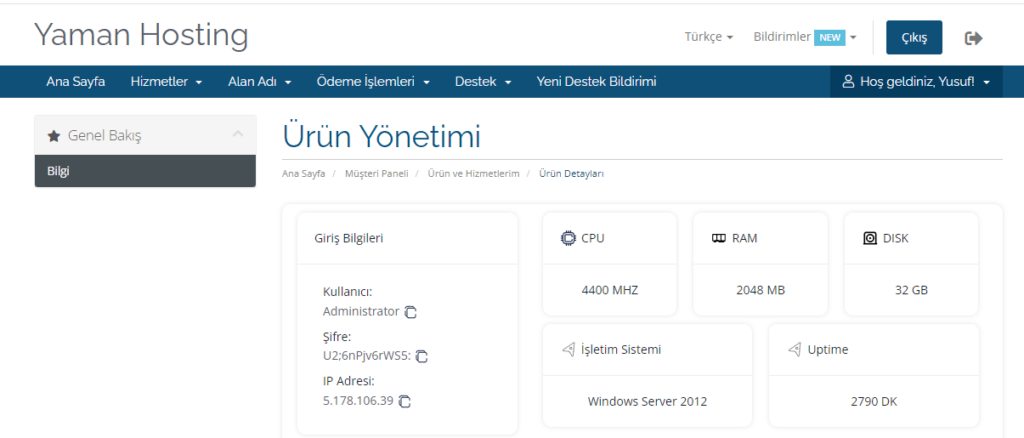
Windows sanal sunucunuza uzak masaüstü bağlantısı yapabilmek için öncelikle sanal sunucunuzun giriş bilgilerini müşteri panelini kullanarak bulmalısınız.

Açılan sayfada ürününüzü kontrol edebileceğiniz bir otomasyon panelimiz bulunmaktadır. Bu panel içerisinde sanal sunucunuza bağlanmak için giriş bilgileriniz yer almaktadır. Bu giriş bilgileri “IP Adresi”, “Kullanıcı Adı” ve “Şifre”‘den oluşmaktadır.

Bu bilgileri kullanarak sunucumuza giriş yapabilmek için bilgisayarınızın arama kutucuğuna “Uzak Masaüstü” yazarak windowsun kendi programını çalıştırmalısınız.

Programı çalıştırdığınızda sizden “Bilgisayar:” adı isteyecektir. Buraya IP Adresimizi yazmalıyız. Ardından Bağlan butonuna basmalıyız. (Bir üstteki görselde nasıl bulabileceğiniz gösterildi.)

Sizden kimlik bilgileriniz istenecektir. Yukarıda bulduğumuz bilgilerimizi burada kullanacağız. Kullanıcı adı ve şifremizi uygun boşluklara girmeliyiz. Ardından “Beni anımsa” kutucuğunu aktif ederek tamam demeliyiz. Eğer burada kullanıcı adı butonu gözükmez ise veya farklı bir şey yazılı ise “Daha fazla seçenek -> Başka hesap kullan” seçenekleri ile kullanıcı adınızı girebileceğiniz ekrana ulaşabilirsiniz.

Tüm bilgilerimizi girip bağlanmak istediğimizde bize sertifika uyarısı verecektir. “Bu bilgisayara bağlantılar için bir daha sorma” kutucuğunu aktif ederek “Evet” butonuna basmalısınız.
Sunucunuza bağlanmak için gereken her şeyi yaptığınıza göre artık uzak masaüstü ekranınız açılmış olacaktır. Burada yapılan tüm işlemler kendi bilgisayarınızdan ayrı bir ortam olarak çalışır. Sanal sunucudan çıktığınızda ekranda bıraktığınız veya çalıştırdığınız tüm uygulamalar aktif olarak çalışmaya devam eder ve kapanmaz. Bu size 7/24 çalışma ortamı ve izole bir sistem sunar.
Eğer tüm kutucuklar aktif edilerek bağlantı kurulduysa (makale içerisinde bu şekilde gösterdik) sizden bir daha şifre veya herhangi bir sertifika onayı istemeyecektir.
Yaman Hosting tercih ettiğiniz için teşekkür ederiz.
